When Pigs Flop; Physical Therapy for our Boar

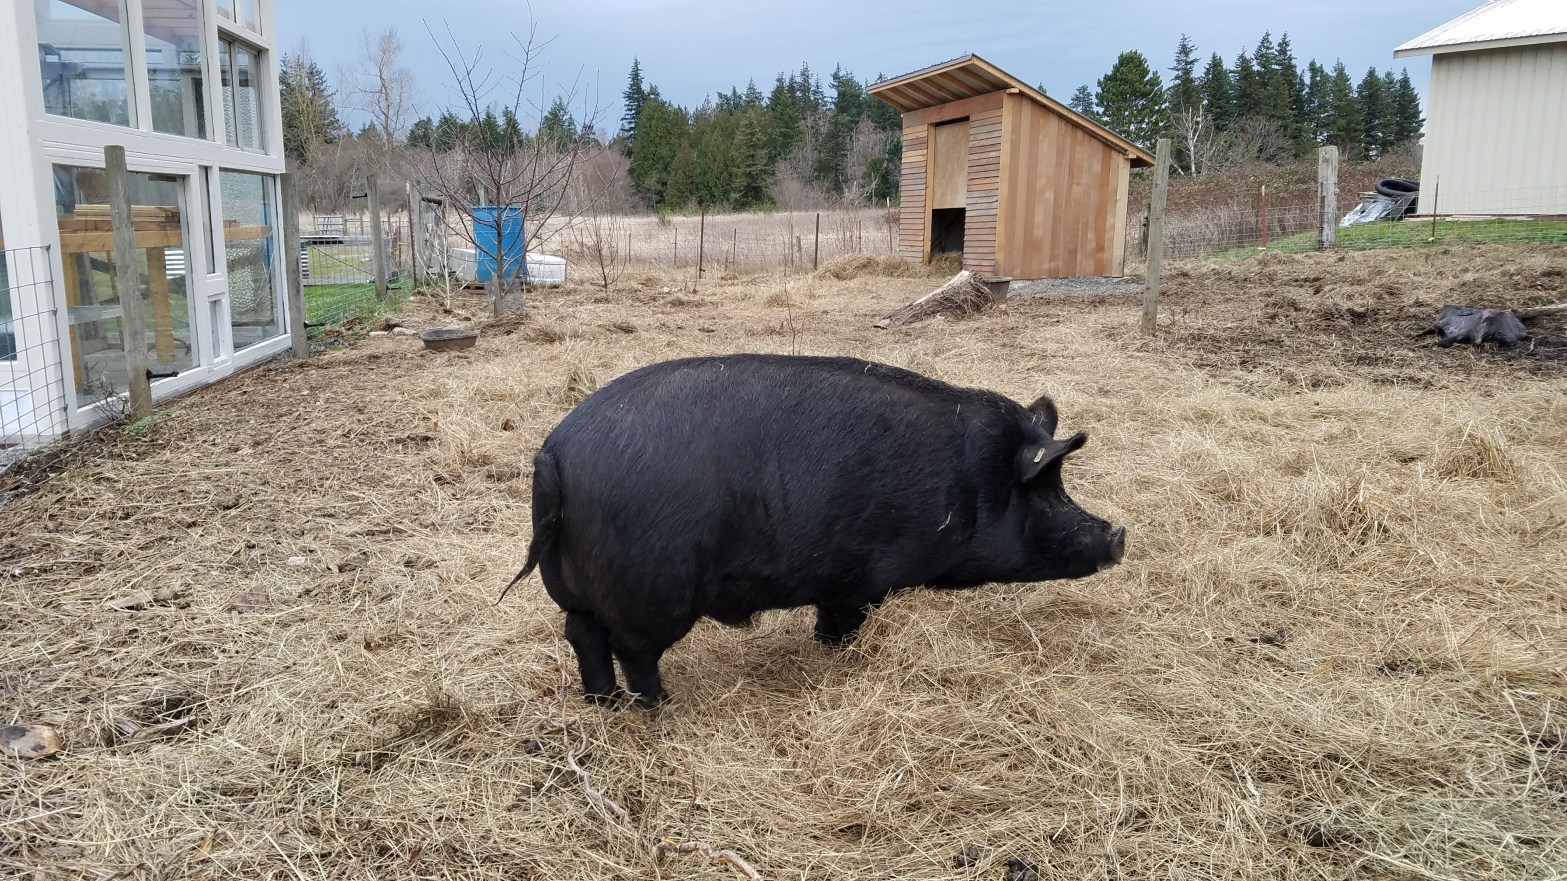
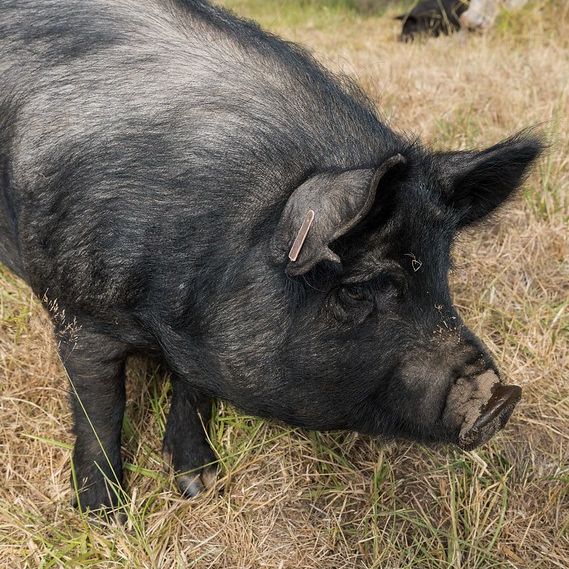
Our boar, Alexander Hamilton, got really sick this fall.  I went out to the paddock we set up under the ancient gravenstein to feed AH one evening and found him napping. At that time the tree was still raining down sweet snacks. There were a couple strewn about.

Odd. But, maybe he didn’t hear the thud landings?

I had cut some grass with the scythe earlier that morning and piled it in the paddock, a bed of fresh greens for his dinner of soaked grain. I dumped the bucket out on top slapping the bottom for emphasis

No movement. Not good.

I grabbed one of the apples and waved it under his nose. No response other than labored breathing and an excess of drainage from his nose. When a hog doesn’t want to eat, you know it is bad. I informed Gwen of the situation when she got home and she immediately rang the vet. The Vet said it was probably pneumonia and that she could come out and give him some antibiotics and pain relievers. In the meantime, we realized our folly. We had let AH’s bedding hay get too thin and the poor pig must have gotten cold. What bad, bad farmers we felt like!

That evening one of the few large animal vets made an emergency after-hours visit to the farm. Meds administered. Phew, crisis averted. Or, so we thought. AH got up to eat the following day (good), but stumbled once or twice (not good). He recovered, but then all 300 lbs of him fell completely over (very bad). So, it was back to talking with the vet, who mentioned that an infection could be affecting AH’s nervous system and causing him to lose motor control. So, another different round of antibiotics and pain meds were given by the vet, as well as instructions for how to give another dose in a couple days.

Only problem was Gwen was headed out of town, so the task of injecting this big tusked daddy twice fell squarely on my shoulders. AH, had stopped stumbling and falling thankfully, but now could barely put weight on his hind legs and was mostly sitting or just lying around. It was sunny when the day came to give him the meds and I was able to catch him napping in the warmth. With a syringe in each hand I decided to give the double dose with one motion and managed to get a full shot behind one ear and a half behind the other. Then, was able to finish the half after he got up to check out the feed I had brought. Phew!!!

Although AH did continue to eat, his mobility worsened. He stopped getting up to relieve himself, and he was dragging his bulk around on his front knees. It took him minutes to heave himself from his side to a half-sitting position. The situation looked bad. On one weepy Thursday evening, Gwen called a friend to come put him down the following Saturday. It was a dark night of the soul as we examined our mistakes as pig farmers: not paying attention to his bedding when it got cold; keeping him separate from the sounder; not moving him to the winter paddock sooner.

In the morning, Gwen decided to call the vet a third time as a Hail Mary. He administered a third ka-POW of an antibiotic and a steroid, and the let us know that we were at the end of the road for treatment options. Give it three weeks–whatever shape he’s in at that time will be his new normal. At that time both the infection and antibiotics will be out of his system, so if he’s not recovered, we could at least process him on the farm and eat the meat.

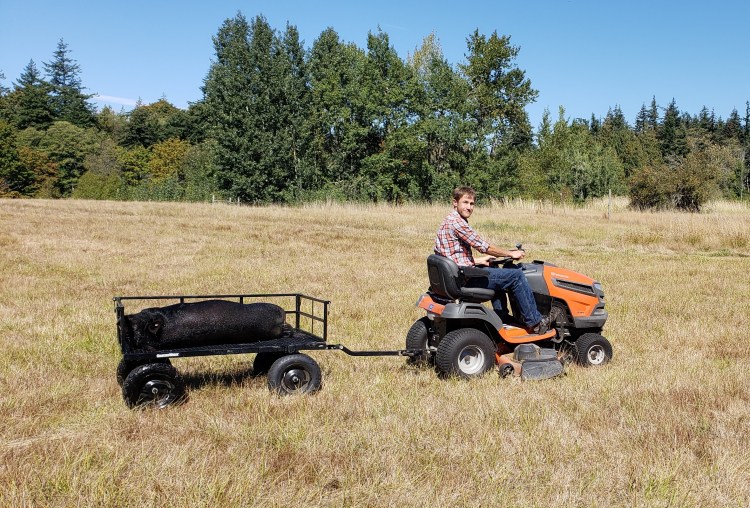
After two weeks, he was a little improved and could get up with some effort, and walk a bit with a lot of effort. The heavy rains were upon us and we really needed to move him to the winter paddock where it was drier and there were other piggos to pile up with for warmth. So, one day even though he wasn’t walking too well, we were able to fold up a hogwire panel into a teardrop shape and lead/cajole/push him 300 yards to his winter home.

Whatever infection he had seemed to have cleared, but it appeared to have left him with infectious arthritis, a complication from a bad infection whereby the bacteria gets into the joint fluid and attacks the cartilage and bone. It’s essentially osteoarthritis, but it comes on in a matter of days and it’s irreversible.

It wasn’t looking good for AH and by extension, any future piglet litters, since a boar needs those hind legs to mount. So, we massaged him and walked him and piled up the hay in his hut to keep him warm. He got lots of pumpkins and apples and even a few doses of CBD marijuana capsules dissolved in cottage cheese.

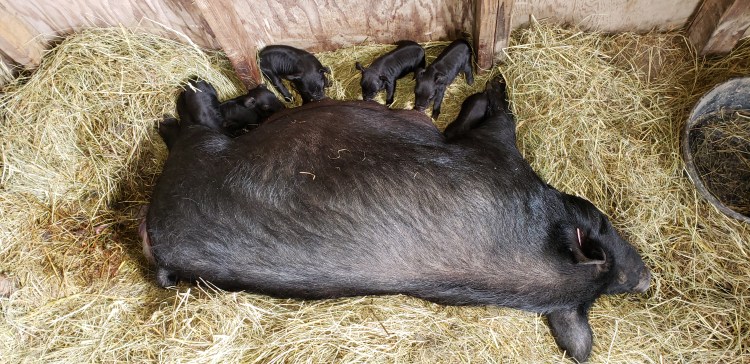
Now several weeks later he is incredibly doing much better. We really thought he was a goner. I mean if you’ve ever seen a pig fall over, it is a very sad and scary sight indeed! And now Alexander is the first to the fence at feeding time and politely, but thoroughly will throw the smaller pigs aside to get his fare share. And he’s sleeping soundly with his sounder once again.

20180603_140143.jpg

American Guinea Hogs: the perennial pork

A tomato plant (the classic annual veggie) typically ripens from seed to fruit in 6-8 months in the PNW. They’re an intensive plant that requires seeding as early as February,  babying the seedlings with heat and light, then transplanting to the ground and covering with plastic to protect from cool nights (which stunt their growth), fertilizing with nitrogen, then trellising to keep the fruit off the ground and away from ground moisture (which curls the leaf and rots the fruit). The payoff is nice, once you get there, but the tomato is a high-maintenance fruit.

Interestingly, hogs grown for commercial markets are butchered at 6-8 months of age, about the same amount of time it takes to grow a tomato. They’re fed a specialized and controlled diet made up of the exactly right blend of protein and amino acids, and they eat 5-10 lbs of this pelleted formula per hog per day. These cornfed blimps grow so fast that they can easily exceed desirable market weight in just a few weeks. This is annual pork: high input and intensively managed.

On the other hand, perennials like apples and asparagus seem to just show up year after year like manna from heaven. Once established, perennials require less inputs of water or fertilizer than their annual counterparts. They still need pruning, occasional fertilizer, and a heavy mulch for winter, but compared to the rigmarole required to grow a tomato, its negligible.

American Guinea Hogs (and other slow-growing heritage breeds like mangalitsa and kune kune) are perennial pork. They can take three times as long to reach the standard 150 lb butcher weight. This type of animal makes very little sense (cents) on the speculative market of pork futures when the future is so far away!

However, on the homestead these slow-growing perennial pigs make sense in a number of ways. First and foremost, they are cute and amiable additions to the barnyard. Even Mama sow with piglets under teat is slow to upset when you pick up the runt to check his vitals. Papa Boar, tusks and all will lie on his side for belly rubs. Unlike humans, the teenagers are actually the most fun age–curious and no longer skittish towards you, the almighty bringer-of-treats.

While they require a small amount of high-protein grain (about a pound a day per pig), their diet is immensely varied when you let it be. They really will eat pretty much anything and many things considered undesirable to the land manager. Weeds like buttercup, blackberry, morning glory, and dandelion are delicacies. They will chomp willow and maple leaves wholeheartedly.  They will eat piles upon piles of grass and hay, to the point where their bedding frequently disappears because…you guessed it…they’ve eaten it.

This diet makes them extremely versatile (not to mention incredibly delicious). They can thrive on pasture, or in the woods, or in a weedy paddock. And the smaller size makes them relatively easy to move when one area gets worn. Just give them protection from the sun and heat in summer and cold and wet in the winter. Not too different from an asparagus bed, really.


Making Mistakes: Life and Death on the Homestead

After Hypatia (a.k.a. Honeybunny, a.k.a. Mommabear) farrowed her first litter of piglets on St. Patrick’s Day, we gave her some time alone with her new family, separated from the rest of the herd. After about 5 weeks, we integrated momma and babes with the other two adult pigs, Alexander Hamilton and Eliza, which went smoothly. Alexander Hamilton seemed more interested in Hypatia’s postpartum hormones than his progeny, whom he ignored. He sniffed her a lot, and seemed confused and put out by her absolute refusal to put up with his courting behavior.

Most mammals don’t go through estrus while lactating. As long as a momma mammal is nursing, she shouldn’t get pregnant. Of course, this isn’t a hard rule, because nature doesn’t have many, and you’re bound to know of at least one set of human siblings who were born a mere 10 or 11 months apart. The same holds true for pigs. It’s unlikely, but it can happen.

After just a few weeks with the whole herd together, we separated momma and piglets from AH before she went into heat again. She’d lost a lot of weight from nursing, and she needed a summer of fresh food to recondition her body before being bred. She slowly gained some weight back throughout the early summer, but not as much as we hoped. She still seemed skinny around her ribs and along her back, though as the summer progressed, her belly began to round out.

Her abdominals must be shot from that pregnancy, we joked. Too bad we can’t give her core strengthening exercises, said Josh, a physical therapy assistant by trade.

Then in early September, a friend came over and fed the pigs some scraps. She pointed to Hypatia’s rounded belly and droopy teats and said, “That pig looks pregnant.”

“Impossible,” we said, “that’s just her stretched-out post-pregnancy belly, and her teats are all saggy from nursing for so long. They never sprang back.” Then we explained about how we wisely separated her from the boar before she went into heat, and therefore she couldn’t be pregnant again, because she’d been nursing during the few weeks she spent with him.

“Um, I think you’re having piglets,” she said.

We laughed and politely dismissed this suggestion from our friend who was not a pig farmer, and therefore what did she know.

Four days later, Honeybunny farrowed. I came home from work to check on her on my lunch break (because she did seem pretty pregnant looking, if we were being honest) and found her nursing six little boarlets!

20180913_123510.jpg

Since we’re old hats at this whole piglets thing, and we knew Hypatia was a good momma the first time around, we left everyone alone and let mommabear do her job.

Unfortunately, 24 hours later we found the biggest most strapping piglet dead in the hut. We don’t know what happened, but most likely Hypatia accidentally stepped or laid on him and he was crushed. Down to five.

Two weeks later, we castrated the piglets. We’d done this once before, and since it had gone really well with no complications, we dove into the task with the confidence of experience. Josh held the piglets, I wielded the scalpel.

While it felt like I made the incisions exactly the same as last time, in two of the five operations, intestine fell out of the incision once the testicle had been removed. Horror!

Panicked, I ran into the house for a needle and thread and then stitched up the incision site in hopes that the wound would heal and the intestine wouldn’t get pinched in the wound as it healed. Pigs don’t survive hernias.

(Some months later, when the vet came out to the homestead for another reason, I explained what happened and asked if it was necessary to catch the piglet with the stitched up scrotum and remove the stitch, and she assured me it was fine to leave it. She also said that the whole intestines-falling-out-of-the-castration-incision thing happens to vets on occasion, too, which made me feel both better and also slightly less confident in the vet.)

Ten days later, we caught all five boys to inspect their incisions and healing progress, and to our horror (again) found that one of them had some type of abdominal tissue hanging outside of the incision site (scary picture available if you want to click here). We called the vet for advice, and he laid out the cost of an operation that may or may not be successful, and we had to do the difficult work of weighing dollars against the value of an animal’s life. Ultimately, we decided to leave the piglet alone and see if it could heal on its own. It did not. Two days later that piglet died. And then there were four.

That was a hard day, made harder by the fact that our wonderful boar Alexander Hamilton fell sick on the exact same day, kicking off a month-long cycle of medication and worry that is the subject of another post.

At times on our homestead adventure our inexperience has resulted in funny anecdotes, and other times scary near-misses, but some mistakes we pay for dearly. I’m sorry that my action caused suffering for one piglet and death for another, and I’ll certainly be more nervous (and less confident) next time we have to castrate piglets. But, there will still be a next time. Like any toddler, these clumsy young farmers are picking ourselves up, brushing off our knees, and wobbling toward the next adventure (and possibly mistake).

Oktoberfest comes to Bellfern Homestead

The pig has been butchered; cans of pickles, sauce, and fruit are put up for the winter;  the wine is bottled; the kitchen is 98% finished with the remodel. Last weekend we finally took a step back from the bustle of autumn to host the second annual Oktoberfest at Bellfern.

Online descriptions of the official German Oktoberfest all emphasize the beer tents, which are apparently the primary feature during this festival. But since we don’t live in Germany, I thought it was fair to be a bit liberal about the focus of our festival as well, and bring it back to what is (I hope) the original sentiment of Oktoberfest: a celebration of the harvest.

The apple press was up and running, and kids and adults alike enjoyed pressing gallons of fresh juice. We served last year’s batches of fruit wine and hard cider, and we smoked a huge pork shoulder on the grill for 18 hours.

It was an evening of friends, laughter, delicious food, happy kids, a dreamy fire, and magically finished with a piano concert, because you never know what talents your friends have been hiding.

(Groovy 70s-lens photographs above by Phil Rose. Check out the rest of his gallery.)

Although I felt completely drained at the end of September, these few hours of fun on the farm refilled my well.

Farmer Josh and Farmer Gwen


Home butchering the homestead pig

At the beginning of September, over the course of 3 very long days, we butchered our first pig on the farm. I’ve been struggling to write this story because I couldn’t think of a way to make it engaging or funny. But Josh helpfully pointed out that wit and narrative aren’t always necessary. Until 70 years ago, killing and butchering a pig was an ordinary day on the farm. It was a very long day, and very hard work, but it wasn’t exceptional or even interesting. It was food for the family. This post is about that, in all its unexceptional non-narrative glory.

Day 1: Killing and evisceration

Our friend Audrey came over to help us. She’s a seasoned huntress and knows how to field dress animals, and her calm presence and positive attitude were exactly the antidote to the jitters that Josh and I needed.

The first step of butchering a pig is killing it (maybe obvious). Most small-time farmers do this with a gunshot to the head. I spent hours researching just this first step, because if it goes wrong, it can be very traumatic for the farmer (not to mention the pig). I could probably write a whole blog post just on gun and bullet options for shooting a pig, and correct angle against the skull, but I don’t feel like an expert on this topic and will save it until we’ve had more experience. Audrey took the shot for us, and she did great. The pig went down immediately.

After the shot, it’s necessary to “stick” the pig, which means cutting the arteries in the neck, making as small a hole as possible, and letting the pig bleed out. It’s important to get as much blood out as possible, because if any blood remains in the femoral artery (by the rear leg) it can spoil an aged prosciutto.

Once this emotionally difficult part was over, the pig had become pork in my mind. We hauled it back to the barn for evisceration.

pigtopork.jpg

When you butcher a pig, you have to make a decision about what to do with the skin. Commercial butchers will skin the pig and dispose of the skin, but home butchers often choose to scald the pig and scrape off the hair, leaving the skin on the carcass. There are a lot of good reasons to scald and scrape when doing home butchery. First, warm fresh fat is SO slippery. Keeping the skin on gives you something to hold onto while cutting the meat. Also, some cuts of meat really benefit from cooking under a layer of skin. For example, a pork shoulder roast or ham with the skin left on are juicier and more flavorful because the fat layer is sealed against the meat during cooking, which lets the cut of meat self-baste. And finally, some charcuterie preparations—like prosciutto—actually require that the skin be left on.

In the barn, we had set up a 55 gallon drum on top of a 210k BTU burner to use as a scalding tank.  Audrey showed us how to set up a double-pulley block and tackle (which we conveniently found laying around our barn from a previous owner).

20180902_154500.jpg
Audrey and Josh getting ready to hoist the pig. Josh is holding the weight of the pig via the pulley, and Audrey is trying to control the swing so that the carcass doesn’t knock over our drum of scalding water.

We scalded the bottom half of the pig first in 145° water, then scraped off as much fur as possible using canning jar lids, which have a nice scraping edge. We then had to flip the pig over and re-hoist it to scald the top half.

20180902_151507.jpg
We were able to scrape the carcass pretty clean.

Once the whole pig was scraped, Audrey taught us how to eviscerate, which is basically the same for any quadruped. I’ll need a lot more experience to feel confident about this part, which felt and looked like a warm squishy mess to me. During this stage, we pulled out the leaf lard (which is any fat on the inside of the abdominal cavity), the edible organs (heart, liver, kidneys), the caul (a spidery fat membrane that is wrapped around the stomach), and the tenderloin. You can also save the intestines to use as sausage casings, but we didn’t have the time or inclination for all of the cleaning that’s involved.

20180902_170602.jpg
I think I’m freeing up some leaf lard from the inner cavity.

Once all the guts were removed, we cut the carcass into halves for easier handling and chilled it for a few days.

Day 2: Butchery

After 3 days chilling in the refrigerator at 34 degrees, it was time to turn our two sides of pork into (semi)recognizable cuts. We learned how to do this entirely from YouTube.

We wanted to try some aged salami and charcuterie, so we prioritized our cuts for those purposes. The shoulders went mostly to ground meat for salami and sausage, and one rear leg was cured into a ham, and the other was cured and aged for prosciutto.

American Guinea Hogs are lard pigs, and this was the lardiest of pigs we have yet raised. You can see that there’s a 2.5-inch thick layer of back fat on the pork chops in the photo above! We estimated that we ended up with at least 40 pounds of leaf lard and back fat from this ~200 lb pig.

20181005_210445.jpg
So much fat! That was only some of it.

Day 3: Grinding and Stuffing Sausage

On the third day, we made sausage. I’ll do a separate post about making sausage, because it’s fun, and it’s nice to be able to control the seasonings and salt levels in the recipe, and you don’t need to raise and kill your own pig to make sausage at home. Anyone can do it. This day was spent chopping fat and pork, chilling it, grinding it, seasoning it, then stuffing it into casings. We made bratwurst, pepperoni, landjaeger, and soppressata.

20180908_161357.jpg
Landjaeger, pepperoni, and soppressata cured for 3 days in a room-temp oven before moving to a cooler curing chamber.
20180908_123958.jpg
Bratwurst.

Lessons learned

  1. Moving around a 200-lb carcass is really difficult, even with carts and pulleys. There wasn’t much to hold onto, and it was as much as the 3 of us could handle. If the pig had weighed 50 lbs more, I don’t think we could have managed it.
  2. The butchery (day 2) was exhausting. My hands and forearms ached for days from so many hours gripping the knife and saw.
  3. Sharp knives are crucial (see #2)
  4. Butcher fees seem really reasonable.

Growing up as farmers and processing our own pork

“If it’s worth doing, it’s worth doing poorly first.” -Joel Salatin

Whenever Josh and I tell someone that we live on a farm, the polite followup question is inevitably “what do you raise?” I think most people are hoping we’ll say tomatoes, but “pork and chicken,” is what we say. “Raised on grass, organic feed, happy and frolicking, that sort of thing.” The next question–usually tinged with a little horror–do you do your own butchering?

“Chickens only,” we say. “We have a mobile butcher come to our farm to do the pigs.” They usually look relieved, and the few who soldier on in this vein of conversation say something like, “I can’t imagine having to butcher a pig. It would be too hard.”

We agreed, which is why we’d never done it. (Also because we sell our pork, and food safety laws prohibit the sale of home-butchered meat to outside parties. If you kill it yourself, you have to eat it yourself.) Butchering your own pig is hard in many ways–emotionally, which is what most non-farmers mean by hard, and physically, which farmers and hunters understand.

The difficulties of home butchery

The emotional difficulty is of course a mental barrier, and that barrier dissolves with more practice and experience. We’ve slaughtered hundreds of chickens in the past couple of years, and although I don’t enjoy processing day, it no longer makes me nervous and jittery, and I love the small cadre of friends who routinely come together to help us out on those long days. We tell stories and listen to music, we share a big meal, and it seems very much the way that meat should be processed, and has been for millennia.

The physical difficulty of home slaughtering is a genuine challenge. Moving 200+ pounds of dead animal weight, sawing through bone, scraping off hair, chopping meat, stirring enormous kettles–processing an animal carcass like a pig can take days, depending what you want to do with it, and it’s exhausting work.

We were able to get past the mental barrier with chickens, and I knew we’d get there with our pigs eventually, and we don’t shy away from physically demanding work. The main problem for us was complete ignorance about the whole process of pig butchery, from the gunshot to the pork chops. We watched dozens of YouTube videos, attended a slaughter at a nearby farm, asked questions on Facebook groups, and listened to podcasts on the topic from Farmstead Meatsmith. We armed ourselves with as much second-hand knowledge as we could acquire, but in the end we needed the real teacher: experience.

Dear Eliza

Eliza and Alexander Hamilton were purchased to be our breeding stock for the farm. Eliza had a sweet personality, she gained weight quickly, she had excellent breed conformity, she was a courageous eater (you’d be surprised how picky some pigs can be). She was everything we wanted to replicate in our herd, except that she couldn’t replicate. Something was wrong with her that prevented her from coming into heat, and although she and Alexander Hamilton were excellent companions, their relationship was never anything but platonic.

Although we knew that Eliza had a near-term future in the freezer, we held onto her as companion for AH, and an auntie to our other sow’s piglets. Sometime this summer she topped 200 lbs, which is as big as a female of this breed will get, but her affectionate and calm nature never changed. Nonetheless, Josh and I were committed to not keeping any pigs as pets, and every month we kept her meant another month of feed.

Why was I dragging my feet, I wondered? Calling the butcher for Eliza seemed terrible for some reason, and for the first time, harvesting her ourselves seemed the less scary option.

If it’s worth doing…

Joel Salatin, owner of Polyface Farm and leader of the local and sustainable food movement, famously said, “If it’s worth doing, it’s worth doing poorly first.” He means that although screwing up is hard, never trying because you’re afraid of failure is much, much worse. It’s worth pushing through the awkward difficultly of inexperience in order to learn a new skill and grow as a person.

Eliza had spent the summer eating apples and sweet corn, she was getting fatter by the day, and we had eaten the last pork in our freezer. It was time for us to grow up, risk failure, and butcher the pig ourselves. (With help from a friend.)

Stay tuned for more details about our first home butcher.

Eliza


Hatching chicks

Did you know that a chicken can “collect” fertilized eggs for up to a week before she begins sitting on the eggs? And that the 21-day gestation cycle doesn’t start until she begins sitting on them? Which means that there’s a one-week period where that fertilized egg could become either a chick, or an omelette?

Our broody hen was sitting on a clutch of 13 eggs that were laid over the course of 3 days, so we knew that all of the hatching should take place exactly 3 weeks later, within a 3 day window. However, of those 13 eggs, we had no idea how many were fertile. We’ve seen Milton active with the hens, but we didn’t know how thorough or equal he had been with his attentions. For all we knew, mamma hen was sitting on 13 unfertilized eggs.

However, on Day 21, I peeked under mamma and saw that one egg had pipped. Hooray! “Pipping” is when the chick first breaks through the shell with its beak. It’s the chick saying “let’s get this party started.” It takes a lot of effort to first pip through a shell, because there’s very little room for a chick to move inside of an egg. Once they pip, the rest of the hatching can take hours. The chick has to slowly “unzip” itself not only from the shell, but from the inner membrane that cocoons it.

newpeeps.jpg
In this photo, the wet reddish blob in the lower right is a chick that fully hatched from the shell in the seconds before I peeked under mama chicken. It’s not dead, it’s tuckered. Eggshells are really hard.

Because nature is sometimes cruel, the very first chick to hatch didn’t have an easy time of it. Although we could see the little beak moving through the hole in the shell, the chick failed to progress beyond the initial pip. 12 hours later I checked on the nest, and two new chicks had completely hatched, but the first chick still hadn’t made it out of the shell. 12 hours after that, two more chicks had hatched, but the first chick hadn’t succeeded in making the opening any bigger than the original hole. Although hatching can take up to 24 hours, anything longer than 24 hours is a sign of a problem. I waited another 12 hours (36 total) before acknowledging that something had to be done.

Most homesteaders will tell you not to interfere with a hatching chick, for two reasons: 1. If it can’t hatch on its own, there’s a reason. That chick isn’t long for this world. 2. Your attempts to “help” a chick out of the shell are very likely to injure it. The inner membrane can dry onto a chick, and peeling it off can essentially peel off the chick’s delicate feathers and skin, causing it to bleed to death.

According to my wise homestead mentor, “Not all eggs will be fertilized, not all fertilized eggs will hatch, and not all hatched eggs will survive the first 3 days.”

Nonetheless, it was clear to me that this chick wasn’t going to make it out without assistance, so it seemed there was little to lose. I carefully peeled off the entire outer shell, and then peeled the sac off, spritzing it with warm saline solution to help rehydrate the dried membrane as I worked. Once free of that membrane, the chick appeared to be fine, if a little weak. I dipped its beak in the electrolyte water and tucked it under mama and hoped for the best.

So much of homesteading is saying Hail Mary and hoping for the best.

Sometimes it works, sometimes it doesn’t.

Just 2 days later, 6 of the 7 new chicks were feisty and robust, while the 7th chick was wobbly and not gaining weight. On day 3, it died. The 3-day survival indicator is due to the fact that chicks digest the last yolk from the shell right before they hatch, and that yolk feeds them for the first 2-3 days of life. That’s why they can be shipped in the mail without food. For some reason, some chicks don’t start eating after hatching, and once that yolk meal is gone, the chick dies. It’s farm life.

In all, we ended up with 6 new thriving “farmyard variety” chicks (e.g., mixed breeds), and our broody hen finally got what she had wanted for so long. While I was pondering how she felt about her new responsibilities–whether motherhood lived up to her expectations–I snapped this photo.

20180710_173548-1.jpg

I think this captures her feelings pretty well. Here’s a closeup:

close up.jpg
I call this the “oh shit” look.

Automation comes to Bellfern Homestead


I work in a big office environment, where people tap away feverishly at keyboards for 8.5 hrs a day. It’s not quite an information services company, but IT impacts everything we do, and there’s not a single department in our building that doesn’t have a wishlist full of menial, tiresome tasks that could be automated if only our IT department had the time to take it on.

And sometimes, they do take it on. When deciding what tasks to automate, our CTO assesses what tasks take the largest number of staff hours versus the complication and expense of developing an automated program. If a repetitive task takes 1000 annual hours of staff time, and it can be automated via a program with only 40 hours of developer time, then it’s often in the best interest of everyone to automate that task. The company saves money, and employees feel greater job satisfaction by having time for higher level tasks. You assess what jobs are the biggest time suck, with priority given to the simplest and most repetitive tasks (which can be most easily automated).

Josh and I are mid-way through our third growing season at Bellfern Homestead. That means we’re on our third garden, our third sounder of pigs (“sounder” is the collective noun for pigs; I know this because I googled it, but if you use it in casual conversation, you are certain to receive blank stares, so beware), and our third season of hay.

Of those 3 things, hay has been the most stressful for us. We have a 7 acre property, and about 5 of those acres are pasture. Pasture = grass, or at least it should. Most pastures are a mix of different varieties, like timothy, fescue, ryegrass, and orchardgrass. Unfortunately, there are plants like thistle, bulrush, and poison hemlock in most fields that are hardier than these desirable species of grass, and without intervention, the weeds will slowly, and then rapidly, begin to outcompete the pasture grass species. Just like an unmown lawn.

There are two ways to keep pasture healthy: rotationally graze the pastures with ruminants (cows, sheep, or goats), or cut the grass and remove it from the field (“haying”). Whether an animal eats it, or you cut and remove it, mown grass pushes to regrow and comes in thicker and more robust than it was before it was cut and allows the grass to compete with the weeds.

We use the hay for animal food and bedding all year long, so it’s important to us to harvest and store enough to meet the farm’s needs until next spring. Although some climates will let you get away with leaving the hay in the fields in giant mounds (haystacks), the Pacific Northwest is not one of those climates. It has to be packaged up somehow and stored under cover.

Recognizing the degrading condition of our pasture, and the bulrush that is robustly outcompeting the pasture grass, Josh began harvesting hay last year with his scythe. You can watch Josh and his scythe in action on his YouTube channel, if you’re into that sort of thing. (Weirdly, there’s a tribe who is very into that sort of thing, because it’s the internet and of course there is.)

After he cut a half an acre or so, we would fluff it up with garden rakes to help it dry, then fluff it up a couple more times the following day, then finally rake it into piles from which we laboriously “baled” it by cramming that hay into a garbage can and tying it off, by hand, with baling twine.

Now, ask me what farm chore I hate the most. The thing I never want to do again. Mucking 20 lbs of chicken poop out of the coop? Nope. Giving a pig an oil bath? Nope (that’s actually awesome). Eviscerating 50 chickens in a morning? Nope. Weedwhacking blackberries? Close, but no.

It’s baling hay. By hand. It’s the worst.

Although we were glad to learn that it was possible to bale hay by hand, we both agreed that the task was #1 on our list for automation.

20180627_125446.jpg
Do you know what this is?

After much hemming and hawing, we decided that it was finally time to get a tractor. And a baler.

There are a few brands that make/made two-wheel walk-behind tractors, including Grillo, Planet Jr. (now out of business, but they still have a loyal following), Gravely (also discontinued), and perhaps the best-known brand, BCS.

Walk behind tractors are not very well known in the U.S., where cropland is farmed at an industrial scale of hundreds of acres and requires massive machinery to manage. The smaller walk-behind tractors are much more popular in Europe and Asia where people are farming small acreage, mostly by hand. Like us.

We have the BCS 852, which is basically an engine with two wheels and a power takeoff (PTO) that can drive dozens of attachments.

20180627_112544.jpg
The Caeb baler

The Caeb baler is made in Italy, and it’s even more unusual/rare than the two-wheeled tractor. It produces “mini” round bales about 50-70 lbs each, wrapped with netting.

Our tractor and baler arrived around noon, and Josh spent the entire afternoon unpacking and assembling them, and by 8 p.m. that same night, we were baling hay! For now, we’re still cutting and raking it by hand, but those chores seem minor compared to the monumental task of baling it.


The Joyful Chicken, Part I

The natural progression of homestead animal stewardship usually goes like this: laying hens (females only), then after you build some confidence with chickens, a rooster is added to the mix, then chicks follow shortly. Because poultry is so much fun, ducks and turkeys come next, then meat chickens. Then goats. Goats are the gateway quadruped species. After you’ve got a goat, jersey cows, sheep, and pigs often follow in short order.

Josh and I took a shortcut in this long-established chain of homestead species management and jumped straight from chickens to pigs, with no roosters, ducks, or goats in between. It’s worked out for us, but there are some gaps in our animal knowledge.

Just 3 weeks ago, a new creature joined the homestead. His name is Milton.

2018-06-18 21.08.16.jpg
Hello. I’m Milton.

We’ve been raising chickens for at least 7 years, and Milton is our first rooster. There are a lot of reasons not to keep a rooster in a flock of chickens:

  1. They’re loud, and your neighbors might hate you.
  2. Roosters can be aggressive.
  3. Hens will lay eggs reliably without a rooster.

But if you’ve got the space, there are good reasons to keep a rooster as well:

  1. They’re fiercely protective of their flock. If you have predators like possums, raccoons, or raptors, the rooster will do everything he can fight off the foe. Facebook chicken groups are full of stories of roos dying to save their hens. Pretty heroic.
  2. If they’re not right next to your house, the sound of a rooster crowing in the distance is a wonderful part of the farm soundscape.
  3. They fertilize eggs and propagate your chicken population.

We recently warmed to the idea of adding a rooster to our flock in light of the following developments: Our hens have suffered some losses from natural causes over the past two years, and the oldest 3-year olds are slowing down egg production. We’ve also seen an increase in predators in our pasture, where the chickens live with the minor protection of an electrified poultry net. And finally, we have a broody hen who is determined to stay broody.

Normal chicken behavior is to lay an egg a day, or every other day, in a communal nest. The chicken may take a few minutes to accomplish this task, or an hour if she wants to chill for a bit, but after laying the egg, she gets off the nest and goes back to her business of scratching and looking for bugs. A broody chicken, however, will stay on the nest and not leave. Other chickens will try to get into the nest to lay eggs, and end up laying eggs next to her and on top of her, and she’ll steal them and sit on them, intending to hatch them. If there isn’t a rooster, then those eggs aren’t fertilized and they’re never going to hatch. A broody hen is very dedicated to her task and will eat very little while sitting on a nest; the owner of a broody hen must “break the broody,” which resets her hormone cycle and she resumes being a normal chicken within 2-3 days. If you don’t break the broody (perhaps the topic for another post), a broody chicken left alone will brood for months trying to hatch those eggs, and can actually starve to death.

Our broody hen was determined to be broody. We put her in the “broody buster” for a few days, she returned to normal, then two weeks later she was back on the nest. Given all the factors with our current laying flock, we decided the best course of action was to get a roo and let that chicken hatch some eggs.

That’s when Milton joined us. Funny thing: if you put an ad on your local facebook chicken group that you’re looking for a rooster, you’ll be inundated with people desperate to get rid of theirs. Weird.

Milton’s first week with his new flock was a little rough; they were thoroughly unimpressed by him. He was a little awkward about initial introductions, and the hens ignored him with determination.

20180605_185549.jpg
Milton: “Hey, ladies, look at me! I’m huge! And orange! And I’m in charge here! LOOK AT ME!!!”
Hens: “I think I saw a bug. Look, over here.”

Eventually the ladies accepted him, and he’s been doing his job as a rooster, both by mounting the hens–regularly, but not brutally–and by protecting them from perceived predators–mostly me. He’s already attacked me once.

Now Miss Broody Hen is sitting on a clutch of thirteen fertilized eggs, and if everything goes well, we’ll have chicks in 3 weeks. Except…we don’t really know what to do next. She’s sitting in an elevated communal nest with the other hens bustling around her. This creates several problems:

  1. She leaves the nest occasionally to eat, and sometimes goes back to the wrong nest, accidentally abandoning the eggs she’s been sitting on for a week in favor of those newly laid that day. This effectively kills the eggs she was sitting on, and we have to start over.
  2. If she manages to successfully hatch chicks, they will jump out of the nest while she’s still sitting and waiting for the rest to hatch. They’ll be unable to get back into the nest.
  3. Newborn chicks are vulnerable, and they’re likely to be attacked and killed by the other chickens.

After consulting with my homestead mentor, we decided that the best course of action was to separate Miss Broody and her clutch of eggs from the main flock and give them a separate brooder space. Fortunately we live on a farm with lots of odd outbuildings that can be quickly repurposed for various animal needs; if we lived in town, it would be challenging to erect a second chicken coop for a broody hen.

Moving a broody chicken is a tricky business. There’s a significant risk that she’ll be upset about the relocation and abandon the nest. To reduce her stress, it’s best to move her at night. Chickens don’t see well in the dark, so if you move them to a new location at night, they usually wake up in the morning without really noticing the change in scenery.

So, last night around 10 after everyone had gone to roost, we pulled Miss Broody out of the communal coop and removed her warm eggs from her nest. We moved her into another building onto a hastily constructed new nest, with her eggs underneath. But she was having none of it. She squawked and tried to run away.

It was crucial that she accept this new nest and sit on her eggs, and that meant we had to prevent her from jumping off. So, we stapled a piece of cardboard over the entrance, effectively locking her inside on top of the eggs overnight.

When I checked on her this morning, I removed the cardboard and she was thoroughly settled on her eggs. Success!

20180619_061615-1.jpg
Miss Broody Hen settled comfortably in her new nest, away from her murderous sisters.

We could have bought 10 replacement chicks this spring for a whopping total of $20. Instead, we got a rooster, assembled a new brooder, and kidnapped a hen and her eggs in the middle of the night and secreted her off to an undisclosed location, where she’ll wait out her confinement and raise her chicks separately.

The cost to effort ratio of homesteading doesn’t always make sense, but the joy to cost ratio usually comes out on the side of joy.

Tallow: a foundational homestead product

About 4 times a year, I make soap. Making soap is one of my favorite recurring homestead chores, and I deliberately make it in small-ish batches so that I’ll have to make it again a few months later, giving me an opportunity to try a new design, recipe, or fragrance.

The main ingredient in my soap recipes is beef tallow (tallow is a hard oil, rendered from the fat of beef, deer, or sheep), which makes a nice hard bar of soap with a small bubbly lather. Although I usually include other oils in my recipe, such as coconut, olive, and castor, you could make a batch of soap out of 100% tallow and it would hold together, clean, and condition your skin. There are very few other oils that can be used at 100% concentration in soap with that result.

[Note: lard (which always refers to the rendered fat from a pig) also makes excellent soap, but in our house lard is more valuable and is reserved exclusively for cooking. We call it “white gold.”]

By the way, if you’re having any sort of “ew” reaction to the thought of beef fat being a primary ingredient in homemade soap, check the label of a bar of Dove, Ivory, or Dial soap. You’ll see the ingredient “sodium tallowate” (in addition to a whole lot of synthetic chemicals), which is beef fat. Undoubtedly you’ve been using beef fat soap for most of your life.

Tallow is an excellent moisturizer, so I also use it to make a healing hand salve with comfrey and beeswax.

In addition to skincare products, tallow has dozens of uses on the homestead, and these are just a few:

  1. lubrication, such as greasing the large iron screw on our apple press a couple of times a year to prevent it from rusting (farmers have also used it for centuries during lambing and calving when they need to grease up to assist in labor)
  2. waterproofing and conditioning leather
  3. conditioning cracked and weathered wood
  4. cooking
  5. suet birdseed patties for the chickens in winter
  6. candles

When I really think about it, tallow is a bit of a miracle product, and it’s really the foundation of many homestead products. Even more miraculous, it’s a byproduct that many butchers and consumers throw away, so it can often be found for very cheap.

One important note: not all fat is created equal. If you’re going to use tallow for any skincare or food use, it should be from grassfed beef. The fat of an animal holds the nutrients and/or toxins of whatever it ate while it was living. Fat rendered from feedlot beef will be yellow, tough, and stinky, and if that’s not enough to convince you, it also lacks Vitamin E (important for skin health), linoleic acid (thought to reduce heart disease and cancer), and omega-3 fatty acids. That’s all stuff you want in your beef fat.

Josh and I buy a quarter of a cow once a year, and in addition to the fat that comes with my order of beef, I get additional packages from the rancher, who says that most of her customers don’t want it. If you don’t have a farmer to ask, try calling the local butcher shop. They’ll often save the trimmings for you from other customers who don’t want it.

How to Render Tallow (or lard, it’s the same process)

Rendering tallow is not complicated and requires no special equipment, though a crockpot and a food processor are helpful.

1. The beef fat will probably arrive in irregularly shaped lumps. There will be some meat attached, and some of the fat will have a lot of connective tissue. If it’s frozen, thaw partially; if it’s thawed, put it in the freezer for an hour.

2. Trim off any bits of meat still attached to the fat, as the meat can make the tallow go rancid. We feed these trimmed bits to our chickens.

gwens-blog-363

3. Chop into chunks ~ 1 inch square and blend in a food processor. You could also run through a meat grinder, if you have one. If you don’t have a food processor or meat grinder, then chop it as finely as your patience will allow. The fat in the photo below has gotten too warm, which caused the food processor to blend it into a paste. This situation is messy and not ideal. If the fat is still partially frozen, it should quickly blend into pea-size pieces.

gwens-blog-364

4. Dump into the crockpot, set to low. Stir every couple of hours. If you’re doing this on the stove, add some water in the bottom of the pot to prevent scorching or use a double boiler.

gwens-blog-365

5. The fat will begin to render into a light golden liquid, while the remaining solids begin to solidify and turn brown. The crispy bits are known as the cracklins. When the cracklins are uniform golden/light brown (this takes 7-9 hours in my crockpot with ~4 lbs of fat), strain the hot oil and cracklins through a fine mesh sieve or cheesecloth.

gwens-blog-367-e1391374321689
Note that this is an old photo from one of my first attempts at rendering tallow, and it’s not completely rendered. You can see that there is still some soft fat in here; this batch needed another 2-3 hours.
gwens-blog-370
The strained tallow.

6. Pour the strained liquid into a container. Wide-mouth glass jars and used yogurt containers work well for storage.

gwens-blog-372-e1391374770165
This tallow is still warm. As it cools, it will solidify and turn a creamy white color. 

Tallow will keep in the refrigerator for a couple of months, and at least a year in the freezer. After a year it will take on odd freezer flavors and I probably wouldn’t use it for cooking, but it would be fine for non-food uses, of which there are many.

Tips

We feed the leftover cracklins to our chickens (over the course of a few days so they don’t make themselves sick), and if you’ve ever doubted the chicken’s kinship to a dinosaur, you will become a believer.  Some people like to add salt and eat these crispy bits.

Do your plumbing a favor and remove as much oil and fat from the food processor and crockpot as you can with paper towels and save these in a ziplock bag. They make excellent firestarters for the grill or fireplace.

What do you use tallow for??? What did your grandma use it for? If you haven’t made it, will you try?