Hot sauce three ways

Let’s do a little free association. When you think about the Pacific Northwest, what do you think of?

Rain, yes, point for you. Mountains, mmhm, good. Salmon! Definitely. You in the back–wet, you say? Well that’s redundant with “rain,” but yes…

You know what no one says? Chili peppers. Chili peppers are not associated with the PNW. Not culturally, not climatologically, not historically, not culinarily. Chili peppers require sun and heat, and lots of it for many days in a row. It’s really hard to grow chili peppers in the PNW.

But I did it.

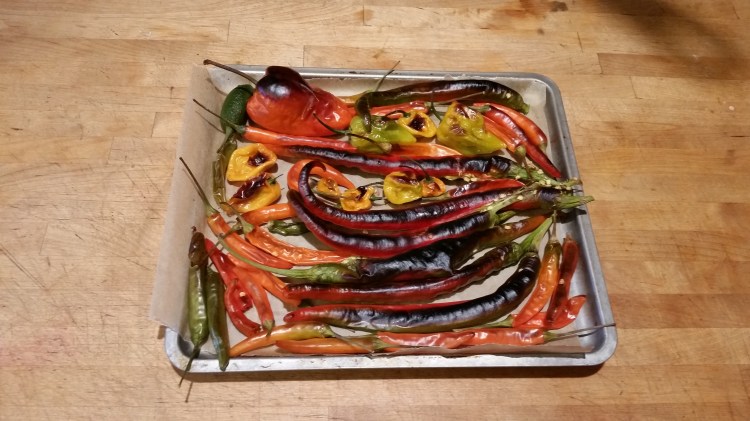
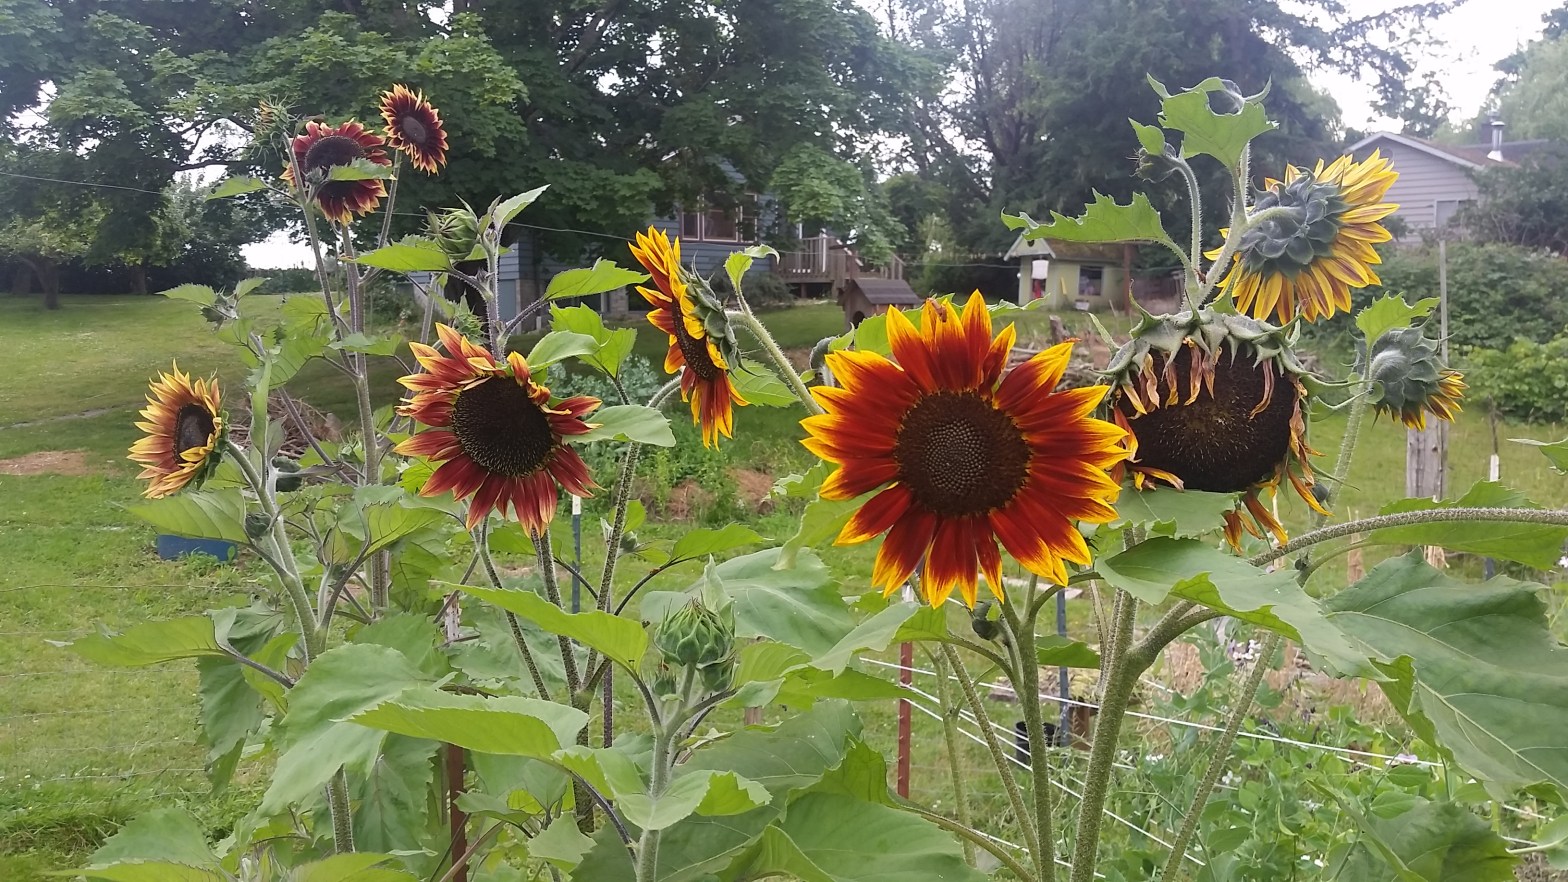
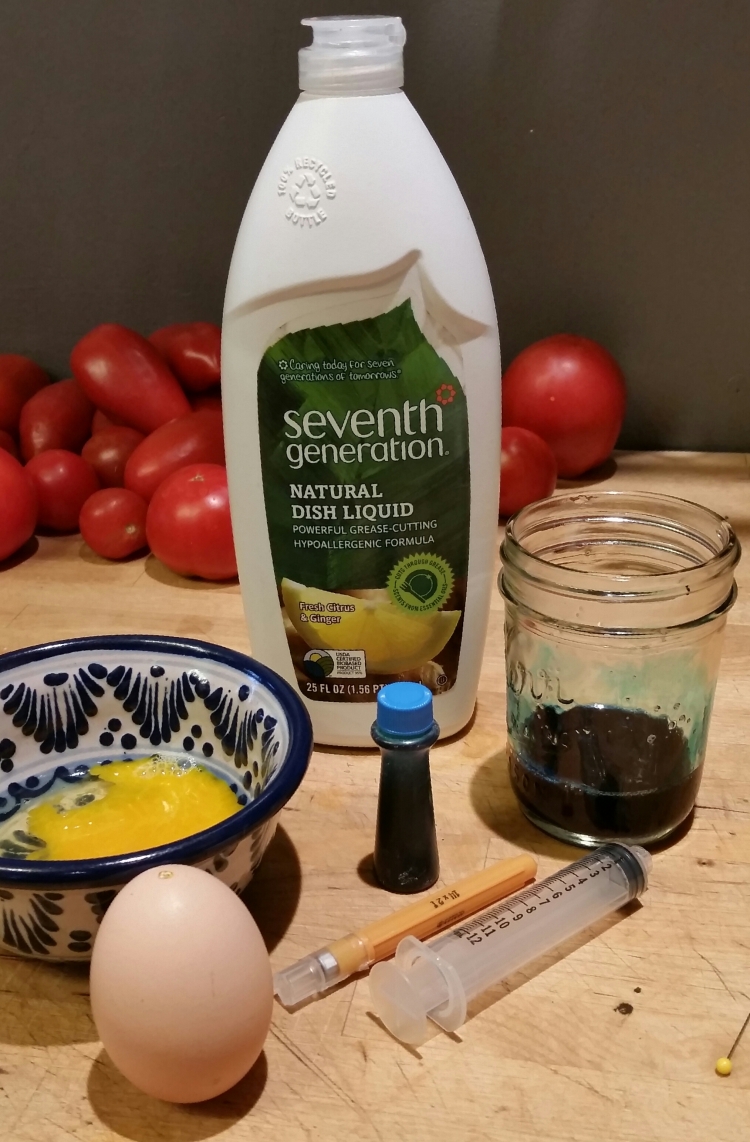
For the first time, I successfully grew chili peppers in our garden! I planted them as starts in early June (which is when the soil finally warms up around here), and kept them covered under plastic for the rest of the month so they wouldn’t be stunted by the cold nights–my downfall in previous attempts. By August, I had some peppers. Interestingly, I found that they ripened in an order that was pretty closely tied to their rank on the Scoville scale.

First the sweet peppers ripened, followed quickly by poblanos, then jalapenos. The padron peppers started to ripen around the same time as the jalepenos. If you’ve never heard of padron peppers (pimiento de padrón), they are a dangerous but less-deadly game of Russian Roulette: 9 out of 10 padron peppers are mild and sweet. But 1 out of 10 is as hot as a thai chili–around 50,000 heat units, if you’re keeping track. And the kicker is that you can’t tell until you taste it. Capsaicin roulette is a fun game to play on a summer evening if you need a pick-me-up. I once tossed a chopped padron into a stir fry without tasting in advance, and shortly found that I couldn’t breathe in my kitchen due to the spice. Yeah, they’re fun.

After the padrons, there was a lull; I had 3 truly spicy varieties, and they were slowly, slowly maturing. By early September, a couple of cayenne peppers started to turn red, and by late September, the thai chilis slowly shifted from green to orange. But the habaneros remained tiny–the largest just a half an inch–and they were steadfastly green. By October the nights were getting cool, so I extended the season with a plastic cover and PVC hoops over the peppers. I thought it was worth seeing if I could eek a few more off the plants.

20170921_154945.jpg

And wow! What success. Although we had some raging wind storms in October, the thai peppers and habaneros speedily ripened under their shelter, and I ended up with approximately 5 ripe habaneros, and handfuls of thai chilis.

If you live in the south, stop laughing. 5 ripe habaneros is a big deal.

The whole point of going to great length to grow chili peppers is hot sauce, IMO. I love hot sauce. In my kitchen, hot sauce goes on eggs, in soup, on steak, roasts, casseroles, pasta, sauteed veggies, and pretty much anything savory. And yes I know that Tobasco sauce is available in every supermarket and costs only a couple of bucks a bottle, but it’s not in the spirit of local, micro, or craft (but I’m going to come back to it).

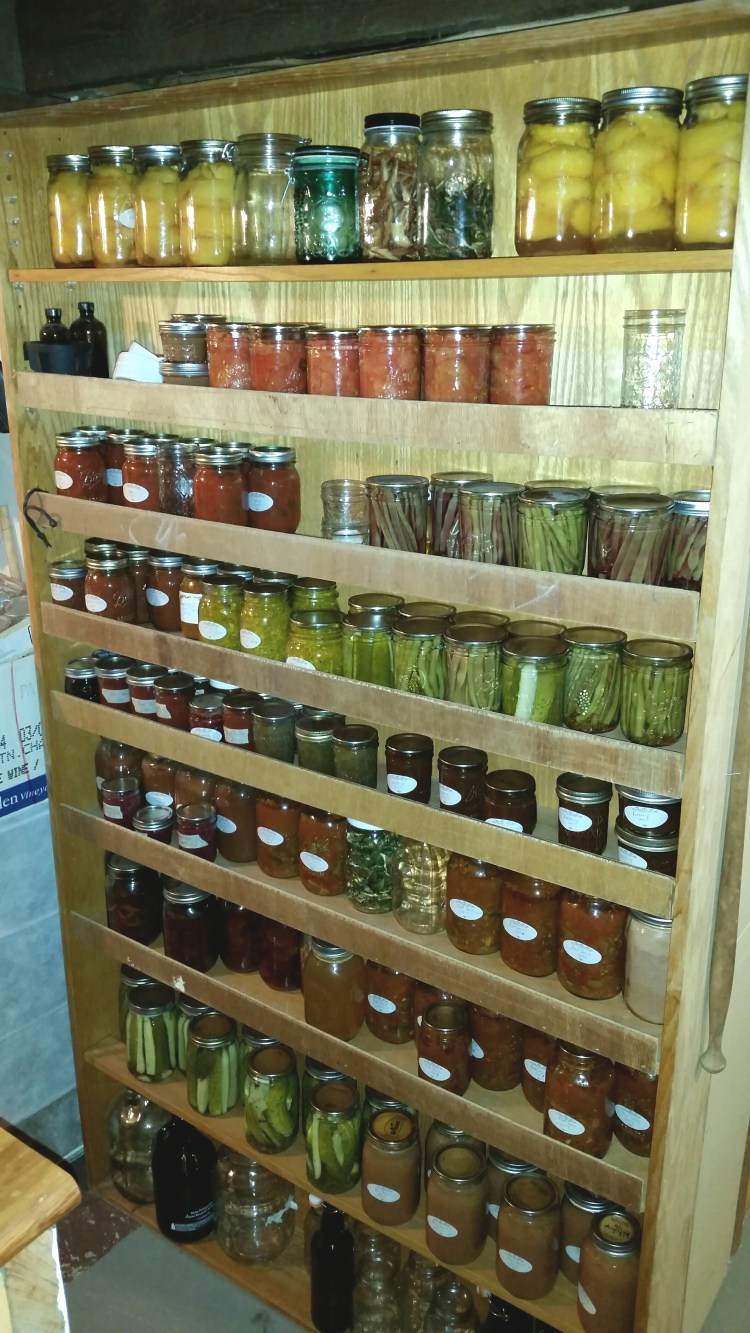
In the end I probably ended up with 2 lb of spicy peppers. It’s not much, but for the PNW it’s a victory, and it was enough to try 3 different recipes for hot sauce.

1. Fermented Hot Sauce

Josh and I love all things fermented, so it seemed an obvious choice to make a fermented hot sauce. But fermented hot sauce has a long lead time, and anytime you’re working with fermentation, you do have a risk of losing your batch to unfriendly bacteria. So I didn’t want to put all of my precious peppers into fermented salsa. I just made a quart, and set it in the cool basement to ferment for 2 months with an airlock.

2. Asian Hot Sauce

Inspired by a modest glut of thai chili peppers, I wanted a recipe that would tip its hat to them with umami flavors of fish sauce and a hint of sweet. This recipe also called for roasting the chilis, which was different than the other 2 recipes.

20171118_123038.jpg

3. Hot Sauce in a Hurry

This recipe was actually the first one I made in early September, when everything was ripe and ready to pick and needed to be processed, and the promise of a 15-minute anything got my attention. This recipe is vinegary and vibrant, and due to the fact that I made it primarily with cayenne and padron chilis, it’s also just medium-spicy, which is nice when you don’t feel like being punched in the mouth by your dinner.

20171214_204141.jpg
Hot sauce 3 ways

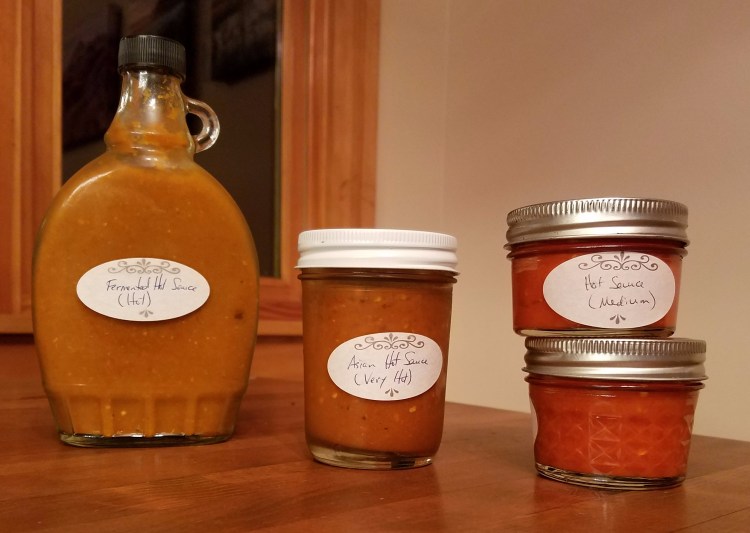
The verdict? Fermented hot sauce by a mile! It’s savory, and umami, and YES spicy, but also rich and tangy and oh so good. Next year I’ll probably only do fermented hot sauce, maybe even experimenting with different lengths of fermentation: 3 months, 6, even 12 if I can stand it.

Which brings me back to Tobasco sauce. Yep, you can find it in every neighborhood diner. It’s the most recognizable hot sauce brand in the U.S., and it’s an enormous corporate-made product. But here are a few more interesting tidbits about Tobasco sauce:

  1. Although huge, it’s still a family-owned business (though some have compared it to the Godfather, so it’s up to you whether this is on the plus list or the minus list)
  2. There are only 3 ingredients: tobasco peppers, vinegar, and salt. These are the same 3 ingredients, and in the same ratio, that have been used since the recipe was developed before the Civil War.
  3. The peppers are picked by hand—not machine.
  4. It’s fermented for three years in used bourbon barrels prior to bottling.
  5. I’m just going to repeat #4 because wow. It’s fermented for three years in used bourbon barrels.
  6. The byproduct from the milling process (when they strain out the solids) is used in muscle rub products, like Ben-Gay, so it’s a make-no-waste sort of product.
  7. The labels, caps, and bottles for Tobasco sauce are all made in Louisiana, within a 2.5 hour drive from the sauce facility. So it’s actually the embodiment of the local food movement.

So, respect, Tobasco. Respect.

If you want to read more:

http://www.seriouseats.com/2013/10/behind-the-scenes-making-tabasco-sauce-avery-island-la.html

Pastured Poultry > Free Range Chickens = Sanity + Sunflowers

For the first year here it felt like trying to drink from a firehose. Now in year number two, things have seemed much MUCH more manageable. I credit two pivotal points for me that turned it around. One, barn organization. The barn, while small, is centrally located on the front property and so, all projects flow from there. The barn is feed, hay, tool, and building supply storage as well as housing stalls for brooding, farrowing, or animals recovering from an illness.

20171122_150320.jpg
Once a dark and dingy corner, now a cozy stall and storage loft.

I won’t go into details with how disgusting and chaotic it was when we moved in, but suffice it to say there was rat poop everywhere! Now, everything has its place and the places are smart. Things used more often are within reach while things used less often are out of the way, but still visible and therefore easy to find. Projects take way less time now and don’t leave you wanting to pull your hair out!

The second major improvement/development was housing the layer hens in the poultry RV. This lovely inheritance took only minor repairs to get up and running, comfortably sleeps 13 birds, and can be pulled by myself with admittedly considerable effort, but hey, “What doesn’t kill you makes you stronger!” Now, as I’ve mentioned in a previous post about Free Range Chickens, they can do some serious damage if allowed to run wild. Especially, if you want to grow ANYTHING from seed directly in the ground and not have chicken poo all over the driveway. Which I do…and don’t.

So, having had a superb experience with corralling pigs behind electro-netting, we invested in a 5 foot tall portable fence that very much keeps the chickens localized, but still allows them to hunt, forage, flap, roost, peck, scratch, and do all the the chicken-y things they are made to do. And, we still get delicious eggs, chicken-y sites and sounds, and directed fertilizing and sod thatching. Actually, they deposit a lot overnight inside the RV which is pretty handy for harvesting. Then, I can place it strategically.

Yes, they have been banned from certain areas because they eat all the sunflower seeds. But now, because more sunflowers grow, voilà!, there are more sunflower seeds for them to eat. I’m sure I am just imagining it, too, but I swear they seem more relaxed now that they have 2,000 square feet to patrol at a time rather than a couple acres and plenty of barn shelving!


The old Barns of Sunset Avenue

The other day we counted nearly a dozen old barns on our quarter mile street. While a couple are melting back into the landscape, many have been refurbished and a few even still function agriculturally. 2017-11-06 17.58.19.jpg
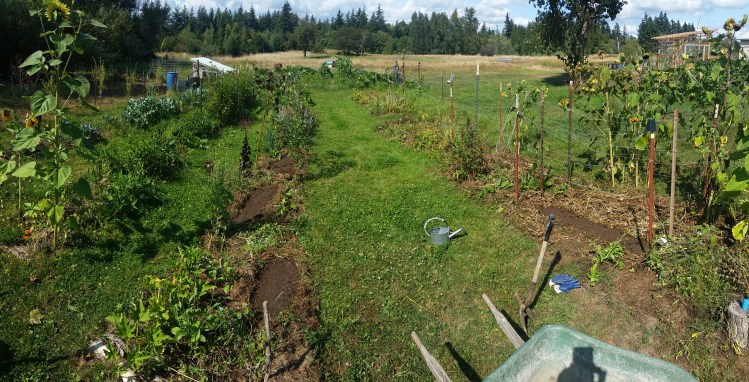
Mt. Baker can be seen towering above one or two if you get the right perspective and serves as a stun-you-back-to-the-moment sort of view, especially at sunset.2017-11-06 19.19.02.jpg

The word barn derives from the old English word byer, or byre. Meaning cattle shed or barley shed. Barns were traditionally built from the timber and, less frequently, stone on the land when clearing for pasture and served to shelter livestock, hay, grain, and later, equipment. They may have gotten their red color from iron oxide mixed with linseed oil which served as a protective barrier for the wooden structures. 2017-11-06 17.54.37.jpg

In America there are as many barn styles as there are nationalities of the immigrants who farmed. Subsequently, what was being farmed influenced design over time. Repeated years of grain intensive farming, for example, depleted soil causing lowered yields. Many farmers turned to livestock to shore up their finances which necessitated larger buildings. 2017-11-06 17.53.40.jpg

Today, it is common to see the small original barns in various states of disrepair. Our 100+ year old barn is leaky, drafty, and structurally sketchy. It wouldn’t be worth it to restore if the previous owners hadn’t redone the foundation and floor, or if it wasn’t so dang charming. It is like an anchor to the past that I don’t want to destroy. 2017-11-06 17.55.26.jpg


Making bacon

People who raise pigs out on pasture all have anecdotes with a similar theme: the day you look at a pig’s paddock and think “they’re almost out of forage, I should move them tomorrow” is the day the pigs will move themselves. Or, if you notice a weak spot in the fence and think “a pig might be able to push under that, I’ll fix it tomorrow,” you’ll find the pig is no longer in the pen tomorrow.

In other words, if you’re not on top of it, pigs will make the farmers’ decisions for them. They have a reputation for being very determined animals. Combine that disposition with hormones, and oh my.

For the sake of clarity in the narrative ahead, here’s the cast of characters:

  • Alexander Hamilton (AH):  12-month old boar. Docile, likes pumpkins. Weighs about 100 lbs.
  • Eliza:  12-month old female pig. Friendly disposition, loves people, Alexander Hamilton, and all food.
  • Hypatia: 11-month old female pig. Skittish, crazy personality. Picky eater. Intended for freezer camp.

Setting:

Two separate fenced paddocks, separated by a half acre of pasture. One paddock contains AH and Eliza. The other contains Hypatia.

Act I.

Although Hypatia and Eliza spent the spring together, they were separated back in July so that AH and Eliza could share the honeymoon suite, with the hope that we’d be farrowing our first litter of piglets in early winter. Hypatia would spend a month or so alone, but once Eliza was pregnant, we intended to put the girls back together.

Except the desired union between our intended breeders never took place. For 3 months, Eliza and AH have gotten on companionably in their cozy paddock. They enjoy the same foods, like the same games, snuggle together when they nap. But he’s never mounted her. Pigs go into estrus every 3 weeks, so we knew there was likely something wrong, but didn’t know if the problem was him or her.

Meanwhile, Hypatia was getting crankier and crazier in her solo confinement, and found new and creative ways to escape her pen almost daily. The past couple of days she’s gone to visit the neighbors (who are very gracious and patient about her visits). Every time she finds a new escape route, we make more quick patches to the fencing.

As part of our preparations for the upcoming cold snap, Farmer Josh decided to do some big-time fence repair around her paddock, so he let Hypatia out to graze in the big pasture while he worked. A few minutes later, he heard squealing and looked up to see not one pig in the field, but 3 pigs, and one of them was Alexander Hamilton, who had broken out of his paddock and had clearly just realized his life’s purpose. He was enthusiastically mounting Hypatia, who apparently was in heat.

Eliza had followed him out of the fence opening he made and didn’t care for this new liaison at all, and she proceeded to chase and bite Hypatia. Meanwhile, AH realized what he had been missing all these months and determinedly chased Hypatia for another go.

She was getting worn out from all of the running, but AH had a one-track mind and continued to mount Hypatia every 2 minutes. Every time he mounted her, Eliza got upset and bit her. It was all very kinky. We agreed we needed to remove the boar from the equation before anything else.

We trapped Alexander Hamilton inside a circular hog panel, which Josh stood on top of to weigh it down. But AH’s strength was fueled by lust and knew no bounds, and he picked up the hog panel with Josh standing on it and nearly escaped underneath. We finally got him locked up in another pen, which he promptly pushed underneath and escaped AGAIN, and started up once more with Hypatia. Which made Eliza start biting her. Again.

Have you lost count of the number of pig escapes and broken fences in this story? So many.

Act III.

Act II involves a lot of swearing, pig chasing, and T-post pounding, so I’m going to jump to the end here and tell you that this all ends with fencing solidly repaired (though my confidence is shaken in that area) and all pigs restored to their original paddocks. Hypatia is confined alone once again, where she will pass out of heat in the next day or two and her hormones will stop wafting over to AH and Eliza’s pen, and AH will return to his rightful mind. Peace (should) be restored.

But wouldn’t you like to be a fly on the wall in AH and Eliza’s hut tonight? I bet that conversation is going to be awkward.

In the course of an interesting afternoon, we learned a lot about raising pigs:

  1. Our boar does not have a virility problem (on the contrary, he has impressive stamina), but our gilt (female) does have some problem that has prevented her from coming into heat. We need to call the vet about this.
  2. Although I expected that a boar would service a pig in a “one-and-done” sort of event, we discovered that a boar can service a pig in heat almost continuously. He mounted her at least a dozen times in an hour and was not remotely done. I do not know if this is normal.
  3. Field fencing is absolutely inadequate to contain a boar when a pig nearby is in heat.
  4. Baling twine rusts and must not be used to secure fence panels to posts. See #3.
  5. In 3 months, 3 weeks, and 3 days, Hypatia should farrow, which means we will have piglets at the end of February.


It’s just muddening (and a few words about “farm plans”)

After 90 days without rain, and one of the driest summers on record, it’s finally started raining in NW Washington. I’m not sad about it. The garden has been very productive, and I’m tired of canning pickles and tomato sauce. I’m looking forward to evenings spent in my living room, the woodstove blazing, watching episodes of All Creatures Great and Small on YouTube while knitting socks. Winter means a slower pace (and flannel! Oh how I’ve missed you), and I’m looking forward to it.

Know what I’m not looking forward to? Mud. And unless you are blessed to live on a high and rocky plateau, mud is unavoidable in the PNW, especially when you own livestock. Many farms are in watershed areas, and most farms have at least some wetland-zoned acreage. It’s (usually) Ok to graze livestock in these areas during the dry summer when the ground is hard and compact, but as soon as the rain falls, they begin to accumulate standing water and seasonal streams.

img_20161106_095822
This is what a wetland looks like.

Livestock, such as pigs, left on these wetland areas over the winter can quickly root up the soil and end up hock-deep in muck.

But don’t pigs like mud, you ask?

Well, yes and no, but more no than yes. Pigs like mud when it’s hot out. Mud cools a pig on a hot day, and it also covers their skin and prevents sunburn, because pigs can get a sunburn just like we can. That’s because their skin is actually really similar to ours (which is why porcine skin is often used for burn research). And because it’s similar to ours, it doesn’t like being moist all the time. Imagine if you had to stand and lay in 12” deep mud for days in a row. You’d probably develop ulcers, sores, fungus, and foot rot. So do pigs.

So you can see why mud quickly becomes a problem when livestock are involved. Our solution at Bellfern Homestead is to move our pigs up to the highest fenced paddock available after laying down a thick footing of wood chips. Really thick. Like 10-12” if possible. This winter paddock is often known as a “sacrifice area,” because you’re basically giving up ever using this area productively as pasture or cropland. For heavy livestock like cattle, paving the sacrifice area may even be necessary.

There are some real benefits to wintering animals on a sacrifice area.

  1. They’re not tearing up your pasture, which is vulnerable in the dormant season.
  2. They’re not defecating in wet areas that drain into waterways.
  3. They’re up off the wet ground, which is healthier for their skin and feet.
  4. They’re probably closer to your house or barn, making chores more convenient.
  5. You will not get in trouble with your local conservation district (more below).


Cons to overwintering on a sacrifice area:

  1. You have to manage the manure. You can’t just leave it to accumulate in a small area all winter. We scoop poop once or twice a week in the winter.
  2. You have to educate your customer base about why their pastured meat isn’t actually on pasture November–April.
  3. The animals can get bored. The more you can simulate foraging, the happier they’ll be. For example, instead of feeding pig mash from a feeder, scatter fodder like apples, winter squash, and potatoes around the paddock for the pigs to find.

I mentioned the local conservation district a few lines above, and if you live in rural Whatcom county then you’re aware of the fury and pitchforks surrounding a proposal by our county council to require “farm plans” for farms with heavy livestock if the farm has any “critical areas” on the property, like streams, lakes, or wetlands.

Local farmers often talk about the conservation district with the same disdain as a ship captain might talk about being boarded by the Coast Guard, but the fear and anxiety is at a new level in my hometown right now. No one wants someone riding in on a high horse of environmentalism and telling them how to run their farm, and yet few people seem to know what a farm plan entails, so speculation and accusations of big government interference are rampant.

I get it. I had some concerns about asking the local conservation district onto my property and getting a farm plan “on the books.” It seemed an unnecessary bit of red tape and bureaucracy, and like every other farmer, I was afraid of being told I’d need to spend thousands of dollars to “fix” something.

My fears were unfounded. What I got was a wealth of advice, information, and resources about livestock and pasture management, nutrient loads, pasture growth rates, and all of the wonderful science of raising pastured animals that I missed out on because I wasn’t in FFA. The basic purpose of the conservation district is to protect the public waterways from manure contamination, and they do this by educating people who raise animals about the downstream effects of manure, and then they give them grants to build fences, gutters, and compost bins.

I think we can all agree that we don’t want poop in our public water. Right? Right?

Anyway, we’ll see how this plays out, but it feels like one more stone in the “us” vs. “them” wall that America is busily building. I feel sad and tired, but grateful to have daily animal chores and winter preparations to focus on. And flannel. And All Creatures Great and Small. And knitting.


The Books That Make Us

At the urging of a homesteader friend, I recently reread Farmer Boy by Laura Ingalls Wilder. I hadn’t read it since second or third grade when I read the rest of the Little House series, but I was surprised to discover how many of the stories were still vivid in my memory as I reread them nearly 30 years later.

51i9pzmehel

The Little House on the Prairie series imprinted on my imagination. If life is a trail with numerous turns, valleys, and summits, then those books were my map. Because of those books, I spent my summers barefoot in my backyard pretending I lived in a sod house. My friends and I caught tadpoles down at the creek, we made elixirs and teas out of the plants in our yards, and I taught myself to sew basic clothing by hand when I was 7 years old.

And I wasn’t alone in my handmade/DIY/prairie days obsession. My closest girlfriends also loved the Little House books, and they lived in Laura’s world with me. We imagined ourselves homesteading on the prairie, doing chores, milking the cows, churning butter, making soap and candles. When I went to college and had to make new friends, my tribe was easy to find: they had spent their childhoods with Laura also. They loved to make things with me, and they were uncomplaining about hard work and physical discomforts. We got on splendidly.

When I recently mentioned that I was rereading the Little House books to a friend in Bellingham, I was surprised to hear that she had never read them, and that no one in her childhood friend group read them, either. It wasn’t a thing.

Huh.

As I processed this information, a few realizations came to me. The first was that my Prairie Tribe is precious. We found each other easily in early life, but we’re more dispersed now, and it’s a little harder to find one another IRL than it used to be, but I’m grateful to have met some of you via the Internet.

The second was that I suspect those 9 books are probably responsible for the life I live today. They made me curious about a different world than the one grew up in in the 1980s. A world without television, frozen vegetables, supermarkets, cars, and shopping malls. I was completely absorbed by Laura’s stories of her family’s self-reliance; when they needed something, they made it. I learned that much of what I relied on to live—clothes, food, shelter—were within my power to provide for myself, if I just learned the right skills. Even the children in Laura’s family had important responsibilities, and they were valued. For an 8 year old, it was an empowering message.

If I hadn’t nurtured a deep curiosity about pioneer skills from a young age, would I be a homesteader now? Would I feel a deep satisfaction from my pantry shelves filled with jars of food from my garden, put up for the winter? Would I delight at the animals that fill my farmyard, in spite of the work and occasional frustration they cause? I can’t imagine the life I didn’t live, but I’m pretty certain that those books are responsible for Bellfern Homestead.

2017-09-10 22.18.03

What books nurtured your young curiosities and set you on your adult path? If you’re a homesteader, what books sparked your imagination and yearning for a rural and self-reliant life?

Caught Blue-Beaked

We’ve wasted a lot of time and effort trying to outsmart our farm pests and farm livestock. For example:

We’ve lined the base of field fencing surrounding a pig paddock with heavy driftwood in a feeble attempt to keep our pigs from rooting underneath the fence, only for them to toss those logs aside and burrow under and out of the fencing anyway.

I built an elaborate rat trap involving a balanced lever and a bucket, but only managed to catch one unlucky rat (out of many dozens), reducing our overall rat population by <1%.

I bought a geolocating tracker device–the kind you attach to your wallet, if you’re someone who constantly misplaces your wallet–in hopes that I could attach it to a broody chicken mama and she would lead me to her hidden nest. We ultimately stumbled across the nest before I could catch the chicken and figure out how to attach the bluetooth chip (but it’s ready for next time).

In short, our efforts to outsmart the animals have been met with limited success. In the scorecard of Farmers vs. Animals, the animals are leading 40 to 2. Until today. Today the farmers scored 10.

Last week we were collecting 9 or 10 eggs a day; this week, egg output mysteriously dropped to a mere 3 or 4 eggs. The problem became clear when we discovered a sopping wet yolk-y puddle in the nest boxes several days in a row. That can only mean one thing: we’ve got egg eaters (chickens, not humans).

Egg eating is a common problem with chickens, usually resulting from them being hungry or crowded. And once a chicken knows that there’s a high-protein snack so readily available, the egg-eating habit can be hard to break. Our chickens are not hungry or crowded, although they probably didn’t have enough nest box space for the number of chickens we have. I suspect that the problem started by accident; one or two of the hens are laying very thin-shelled eggs. The first ones were probably broken on accident by the next hen that sat on the nest, but once the chickens discovered the contents, they started breaking them on purpose.

In our years of owning chickens, this is the first time we’ve encountered this problem on this scale. We aren’t just losing one or two eggs a day; we’re losing half a dozen. That’s real dollars.

The internet suggests a few approaches to thwart egg-eaters:

  1. Make sure there are plenty of nest boxes, and make them as private as possible (fixed, Josh added 2 new boxes to the coop).
  2. Remove the eggs ASAP, before anyone can crack them open (will do).
  3. Put decoy ceramic eggs in the nest boxes, so that the chickens will get tired of cracking their beaks against something hard (check; you can get these at most farm stores).
  4. Finally, see if you can find the egg-eating culprit and isolate her.

Here’s where our success story begins.

How to catch an egg-eating hen:

Poke holes in both ends of an egg and blow out the yolk.

2017-08-21 20.25.08

Add a few drops of food coloring (I recommend green or blue, since red looks like blood and can cause pecking, and yellow isn’t very visible) to dishwashing soap. Using a 14 guage or larger livestock syringe, inject the colored soap into your hollow egg.

2017-08-21 20.26.35

Wipe off any excess soap and use some masking tape to seal the holes on each end. Place in the nest box. Tap your fingertips together and feel diabolically clever.

20170821_194659-1

The genius of this approach is that it both punishes the hen for pecking the egg (because it eats soap–gross) and it identifies the culprit. Just look for the blue beak.

I only had to wait about an hour before my egg-eating hen made herself known. One chicken’s beak was unmistakably blue! You’re going to have to trust me on this, because I couldn’t get a good picture of her. She knew she was guilty and wouldn’t hold still for a mug shot.

So, we isolated her. I set the broken blue eggshell (still full of dishsoap) back in the nest, just in case anyone else wanted to have a peck at it. And sure enough, 15 minutes later, who’s got blue on her face?

2017-08-21 21.44.40
Caught.

Buoyed by my success, I filled a second blown egg with blue dishsoap, and we’ll catch more egg eaters tomorrow.

So far this is only a partial success story. We’ve identified the culprits (10 points for Farmer Gwen!), but haven’t yet broken them of the habit. That will be stage 2, hopefully accomplished by isolation, ceramic eggs, and sore beaks. But if we can’t break them of the habit, then we’ll have chicken soup. Because that’s the inevitable end for an egg-eating chicken.


Using pigs and chickens to convert pasture to garden beds

Needing additional space for cabbage, beans, corn, and winter squash, we decided to expand the vegetable garden this year. The ideal location for this row cropping is our level pasture, of which we have WAY more than we can use at the moment.

The spot we decided to annex was covered by foot-tall grass, along with the usual weedy suspects (buttercup, thistle, dandelion, lamb’s quarter…). American Guinea Hogs love to munch the majority of the greens above ground as much as they like roots and grubs below. So, we corralled the piggos within electro-net and sat back while they did good work. This spring was really, really wet, and even with small pigs on the grass, they rooted it up lickity split. wp-1499216680736.

We left them on the annex for a good three weeks, and all we had to do was top off their water, bring them a spot o’ dinner, and of course give a belly rub from time to time. When all was said and done, they ate and dug up about 80% of the green matter. Some root clumps still clung on tight, and the clayey soil was not yet workable.

2017-07-04 19.55.20
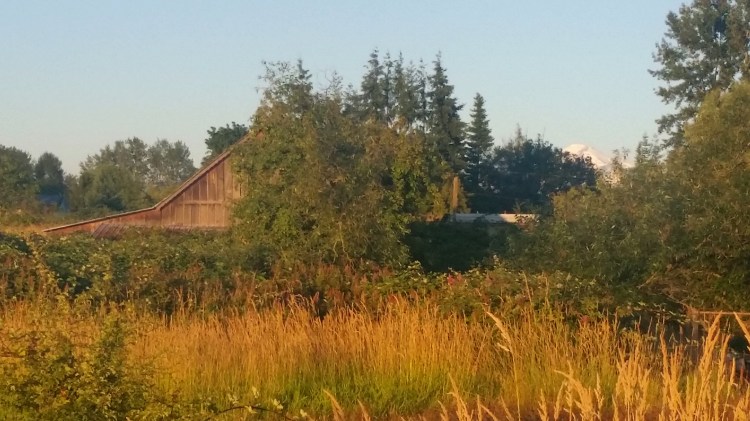
To speed things up, we rented a heavy duty tiller, since the pasture had finally dried enough to use it. (We also used it to repair a large over-used weedy paddock while we had it). Then, the best tillers of all got involved to finish it off: the chickens. We put 6 hens in the portable chicken tractor and moved it daily for another week.

They scratched and pecked at weed seeds and bugs, further softening the soil. Both the pigs and chickens, of course, fertilized the entire area. 20170614_134441
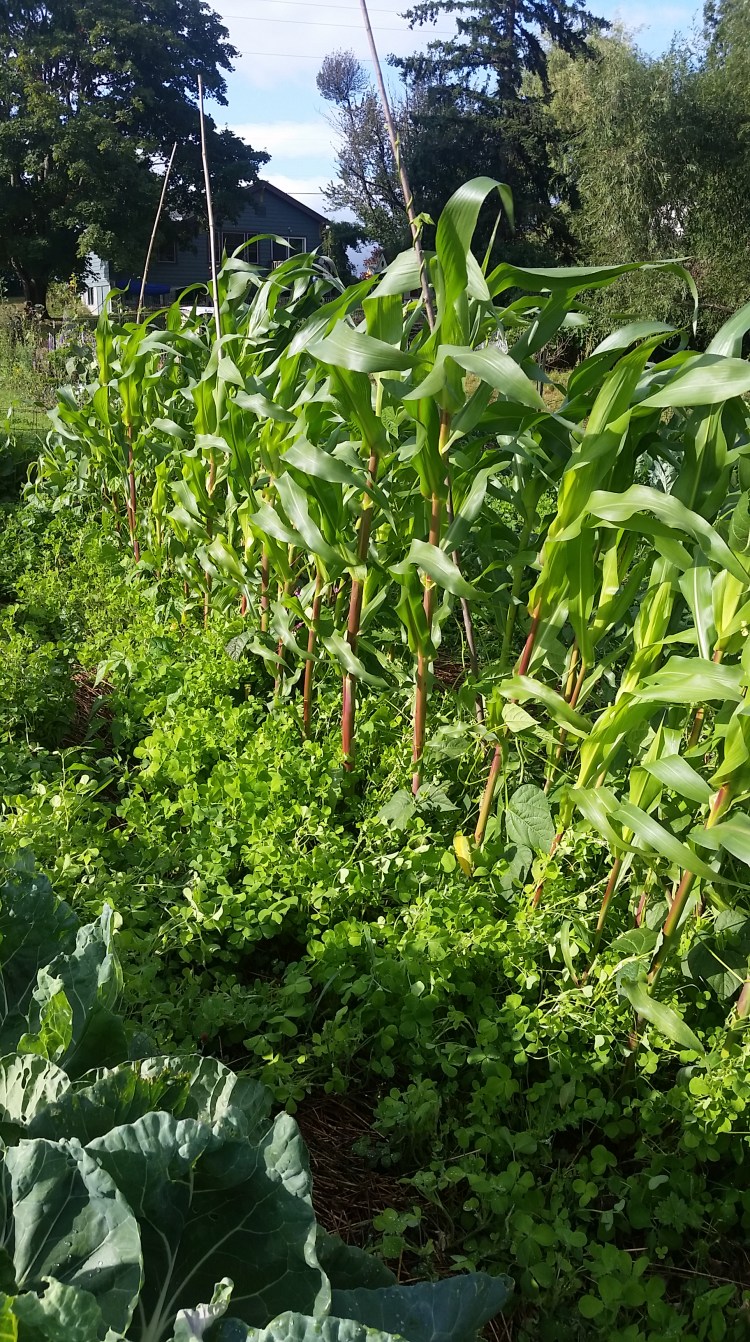
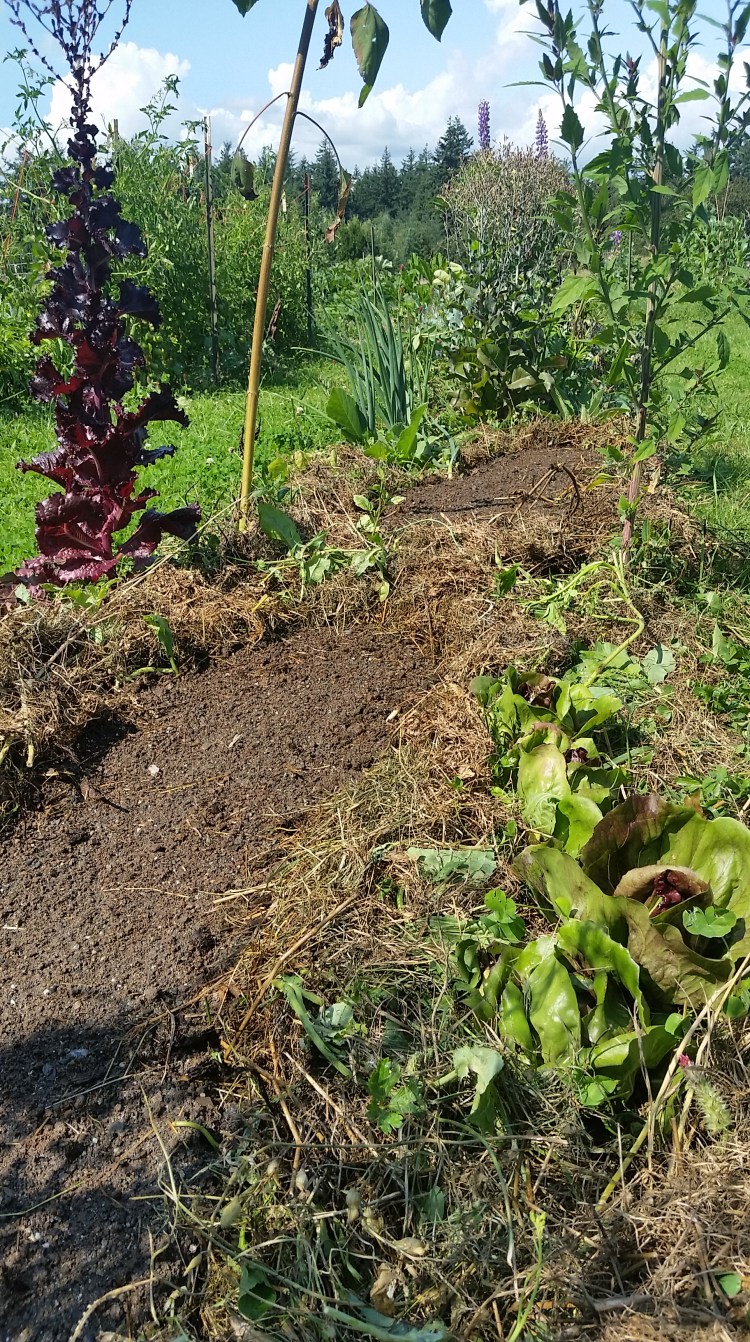
With the soil finally friable to a few inches, I raked it into raised beds. Then, I mulched the pathways with bog rush–a reedy and otherwise useless (to my knowledge) plant that takes a long time to break down. I also lined the steep bed edges with scythed grass clippings to retain moisture and keep down weed pressure.  20170614_175512

I broadcasted a living mulch of red clover and we transplanted the veggie starts.

20170704_170530

That was May/June and now in mid August the garden is gangbusters. The corn is tall, we’re pickling beans and cucumbers every weekend. The swiss chard is large and delicious. The cabbage looks good, the beets are coming along, and the winter squash is taking over.

I will admit that the clover has been more vigorous than I imagined and it has threatened to swallow up the adjacent veggies. But, with regular and selective mowing with a serrated sickle it doesn’t impede its neighbors. In fact, with its nitrogen fixing properties, it actually helps!

20170813_084812
Corn finally out-competed the cover crop clover

My understanding of nitrogen fixers is they will take free and available nitrogen from the air and put it into the soil through nodules in their roots. When cut back, they will self prune their roots to match the above ground pruning and release even more.

As an added bonus, the chickens and pigs get repaid for their hard work with a high protein snack in the form of the cut clover and any errant weeds. Of the latter, there really aren’t many since the clover germination rate had to have been upwards of 90% and it created a dense carpet that suppressed weed growth.20170821_081631

Because I broadcast by hand there were thin patches. In these open areas I later direct-sowed beet seeds. Then when mowing/harvesting the clover, I used nearby clover to mulch the seedling beets. Below you can see the before and after freeing the beets.


20170813_084736

Believe it or not, that first photo with the pigs is taken from the same vantage as this bunch of abundance. So, something is working anyway!

Mole mix; making potting soil out of what you (might) have lying around.

Moles, what a scourge, right? Busily making mounds in your front lawn and tunneling through the garden nibbling on roots. Gasp! Although our days of upholding a certain amount of curb appeal are over, I’m still occasionally annoyed by the active mole population here at the homestead. I like to mow grass and cut hay with a scythe and there’s little more frustrating than dulling the razor sharp blade in one of those freshly tilled hills.20170815_111557

In permaculture  (a design science based on natural patterns) there’s a saying, “the problem is the solution.” Although I haven’t fully wrapped my head around that one yet, I’m beginning to understand the wisdom of facilitating interconnected systems. Of ‘closing the loop’ if you will. Because we are only part-time farmers, interconnecting systems is the only way we are going to have a shot at managing so much property as it saves time, money, and effort.

Here we’ve got the problem of a mole mound ruining the efficiency of my work. Traditional gardening wisdom says to remove the problem by removing the mound, right? Sure. Or better yet, poison the little buggers. Then no more mounds! Well, to that I say, have you ever seen the movie Caddyshack?20170815_065451

Again, much of what we do needs to have multiple affects (stacking functions, another permaculture principle). If you must remove the mound, you should also harvest the mounds. The same goes for grass clippings and weeds which become mulch or fodder for animals. A fruit tree can be aesthetically pleasing, delicious, provide shade, a place to hang a hammock. You get the idea.

Back to the moles. So far they haven’t caused any discernible damage to any crops, so I let them be. (Rats and sparrows have not been so lucky.) Truly, I am currently celebrating their incessant and thorough tilling because of the fine soil they produce. Twice now I have made 6 cubic foot batches of what I like to call mole mix. 20170813_130438

Now our property is very clayey, so what the moles churn is also clayey. And clayey means theres little air and a lot of locked up nutrients. So, to the mix I add organic matter and sand. We’ve had a sand pile lying around since I laid the custom greenhouse foundation.20170813_123303

As for the organic matter, our compost pile isn’t ready yet, so I grabbed a bucket of pig poo (which needed to be scooped anyway; problem <–> solution). The poo was decidedly poo shaped and needed some pulverizing, which was easy enough on the asphalt driveway with an old hoe. Recipe as follows:

Mole Mix:

  • 4 buckets mole hills
  • 7 shovels of sand
  • 1 bucket pig manure (or 2-3 of compost)

Mix. Spread. Sow seeds. Water.

I just furrowed a channel in the mulch, shoveled and leveled the mix and voila! Better than any seedling mix you can buy in a bag. Time will tell how weedy it gets, but in reference to another 80s movie, “I ain’t scared a no (ghost) weed.” 20170813_15141720170813_151817

Apparently, making a mountain out of a mole hill turns out pretty good!


In the old days: how to store pork

I have a farm mentor, and for this I am blessed. Her family farmed “in the old days” for generations, and they’ve passed down stories about the ways they used to do things, before modern technologies like refrigeration.

She’s a treasure trove of tidbits of wisdom, and now and then she dispenses them to me. And because this information is valuable and shouldn’t be lost, I’m sharing it with you. Keep in mind that this is oral history, and the methods of food preservation I will share may not pass modern standards of food safety. That said, this is one of her stories:

How to store pork for the winter

“My dad told me stories of the annual fall pig butchering with his extended family. The whole family gathered at my great-grandparent’s farm after the first hard frost. All the adult children and their kids (my dad and all his cousins) brought all their pigs to one place.

“The family tradition was to raise one pig for each person in the family plus one extra for feeding company during the year. The men did the killing and the scalding/scraping. The women helped with the cutting and rendered the lard over open fires. The kids stole scraps of meat and pieces of liver, stuck them on the end of a stick and roasted one bite at a time in the scalding fire. That was one of my dad’s favorite childhood memories.

“In the days before refrigeration, the whole family would gather for hog butchering day. Once the pork chops were cut from the loin, the women would fry all of the pork chops and pork steaks and put them sizzling hot into a large crock, layered with hot melted lard. When the crock was full, it was topped off by a thick layer of hot fat. The crock was then stored in the root cellar, and when you wanted pork chops you would scrape off the lard, retrieve your chops, then “re-seal” the remaining chops with another layer of hot fat.”


If anyone tries this method, let me know 😉